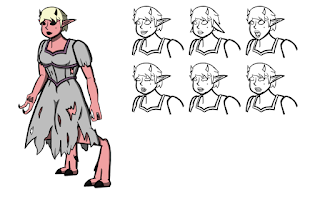
To start my character sheet I used the lasso tool to duplicate part of my character's head, which I then tweaked for different facial expressions. Whilst not important, I wanted them on there to portray more emotion in her.
Next I worked on creating a walk cycle. I duplicated the side view of her that I had created for my model sheet so that I could create a basic frame to work with. Because of how long it would take to re draw her for each part of the walk cycle, or to even tweak each drawing, I will keep this as stick figures. The stick figures themselves are still very easy to read anyway. In order to keep the limb proportions accurate, I used the ellipse tool to create 3 circles at different joints (blue for hip, yellow for the knee, green for the ankle) so that I could make sure they all moved within these areas. Each leg joint is on separate layers and whenever I rotated the knee joint, I made sure the foot's layer was also highlighted so it moved with the knee. Once I had the entire walk cycle finished, I drew lines to connect the joints together and then duplicated it all, darkened it and shuffled them around for the placement of the other leg. Darkening the duplicated set adds a bit of depth to them and makes it easier to tell the two legs apart.
It was suggested that I work on some hand studies for this character to show how she grabs things and how her hand works in general, so I created a few different sketches of her hands to show these off.
Since I had a lot of space free on my character sheet I decided to do a few quick, small studies of my character doing a few different things to showcase her personality a bit more, as well as creating some attacking ideas using her claws.
After these studies, my character sheet has a lot more content and shows off my character a lot better, so I can now happily say that this character sheet is finished and illustrates how my character would move, act and fight.


No comments:
Post a Comment